
The Network Tagging feature allows brokers to upload, manage, and identify carriers within their own network directly in the product experience.
Available Tags
- In Network – Identifies carriers that belong to your preferred carrier network.
- Blocked – Identifies carriers that are on your company’s blocked or Do-Not-Use (DNU) list.
Uploading Your Carrier Network List
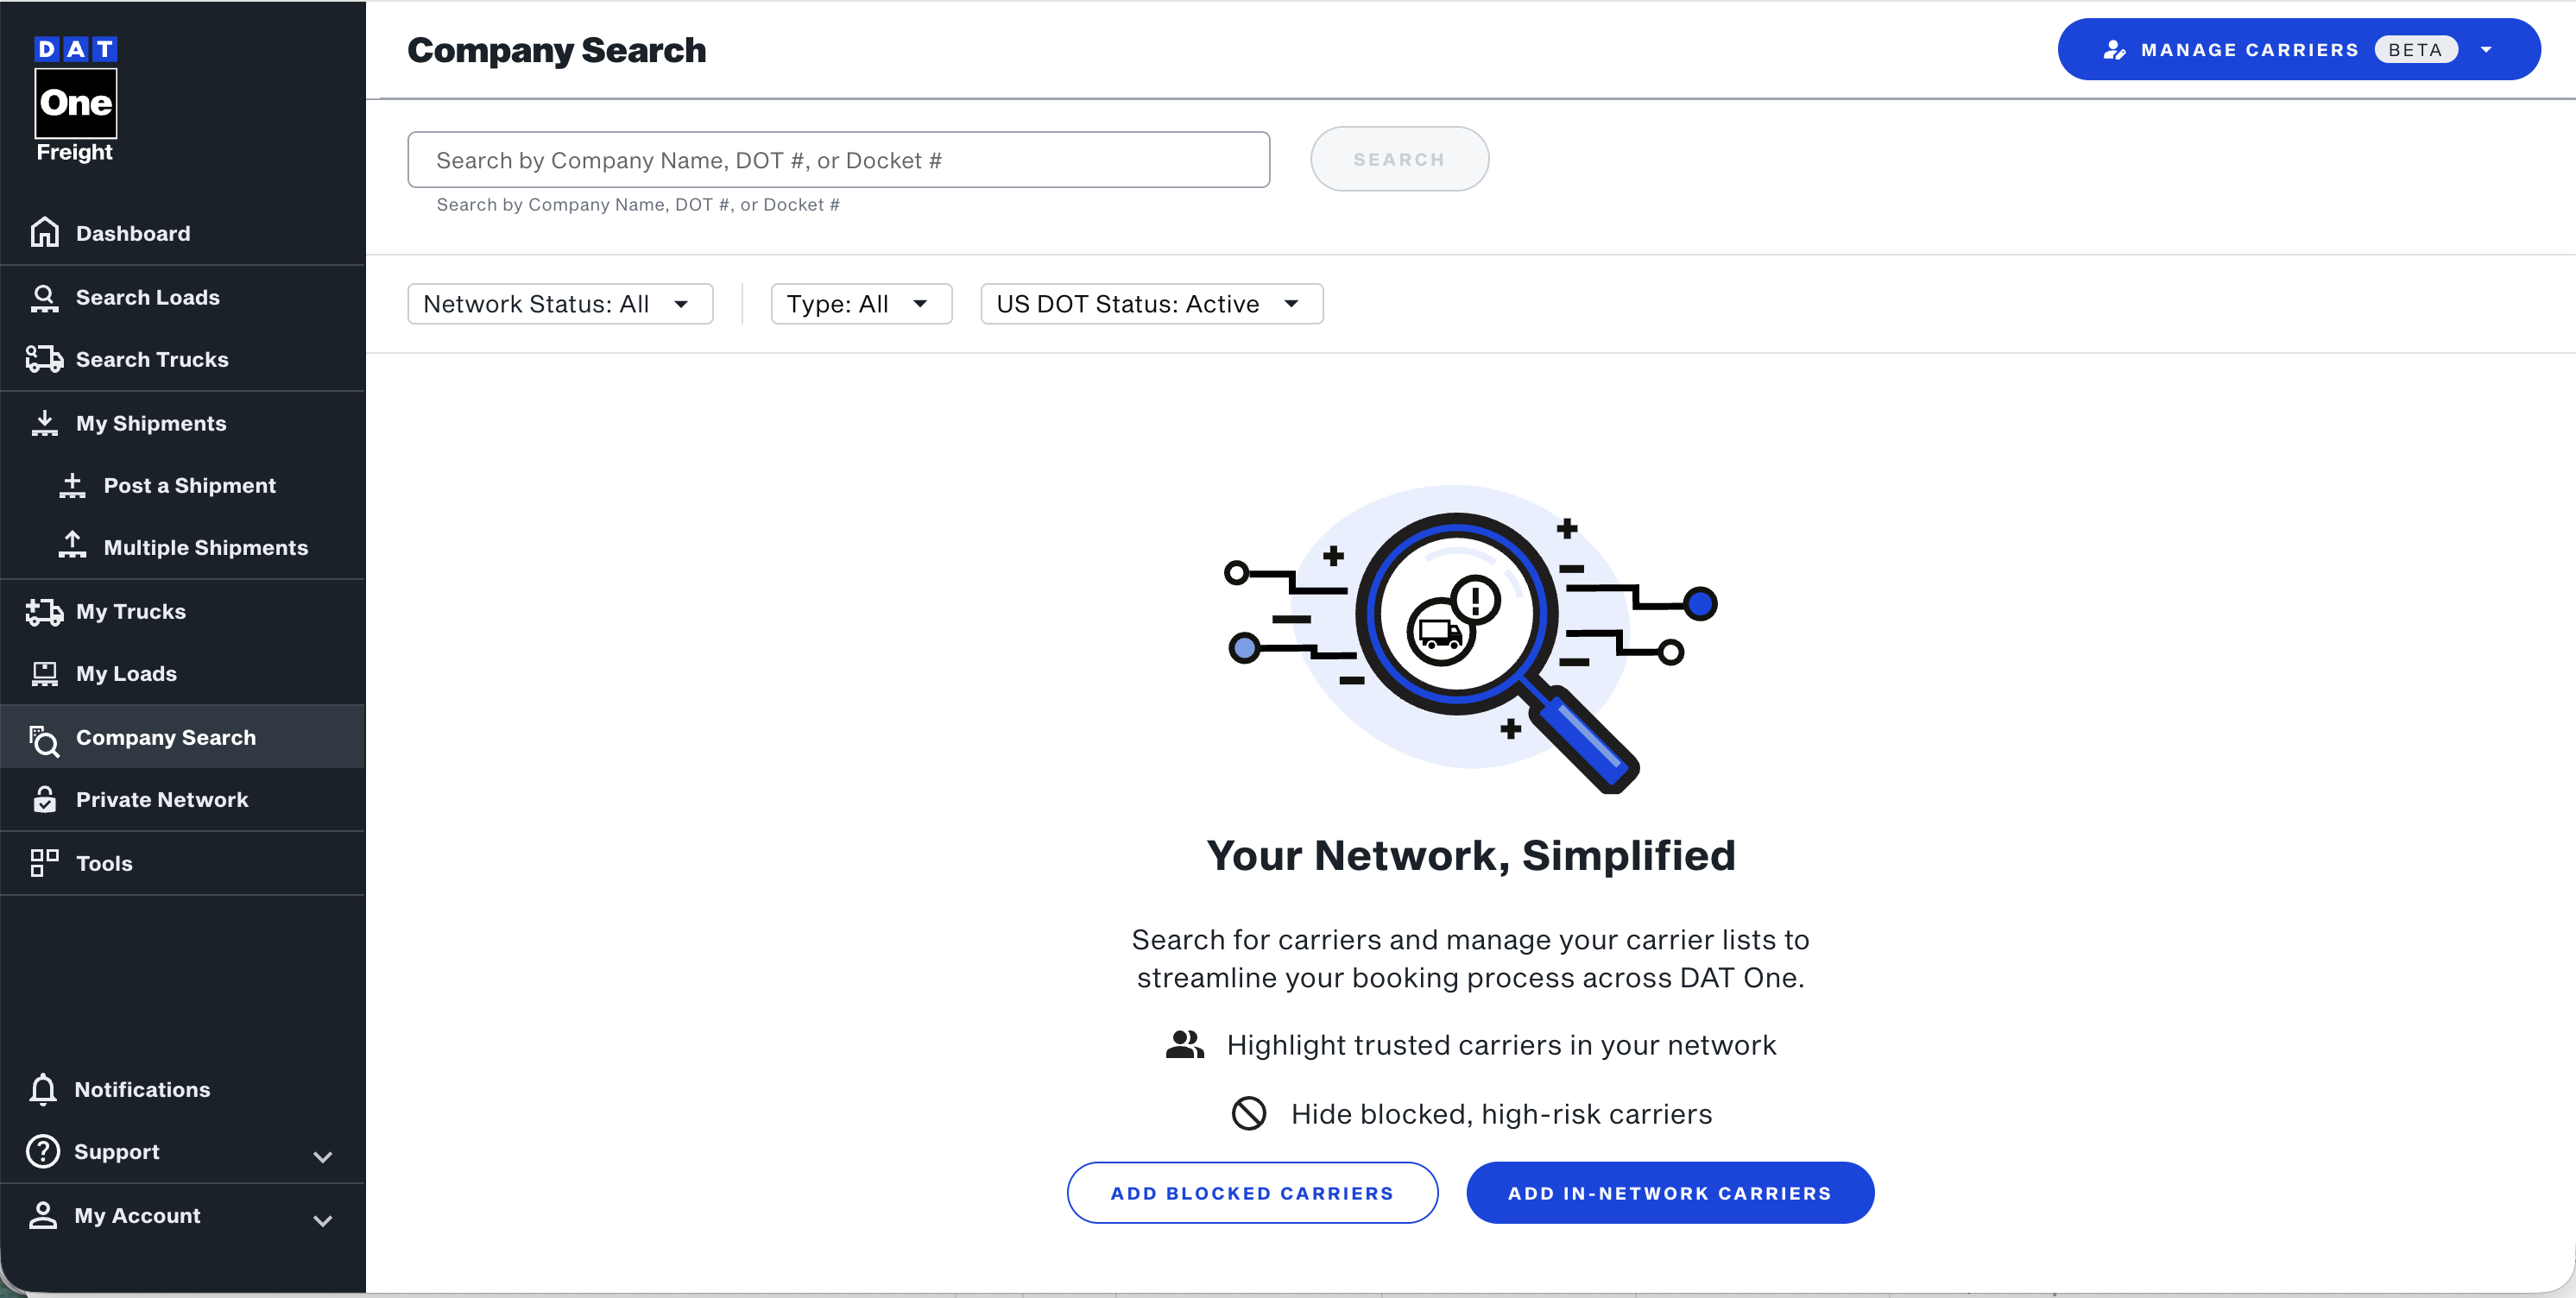
You can manage your carrier network through a CSV upload in the Company Search experience.
- Navigate to the Company Search page.
- Click the Upload your carrier list button at the top of the
page.
- Create a simple two-column CSV file:
- Column 1: Carrier DOT Number
- Column 2: Assigned Tag (supported values include Network or Blocked)
- Upload your file by dropping it into the upload tool.
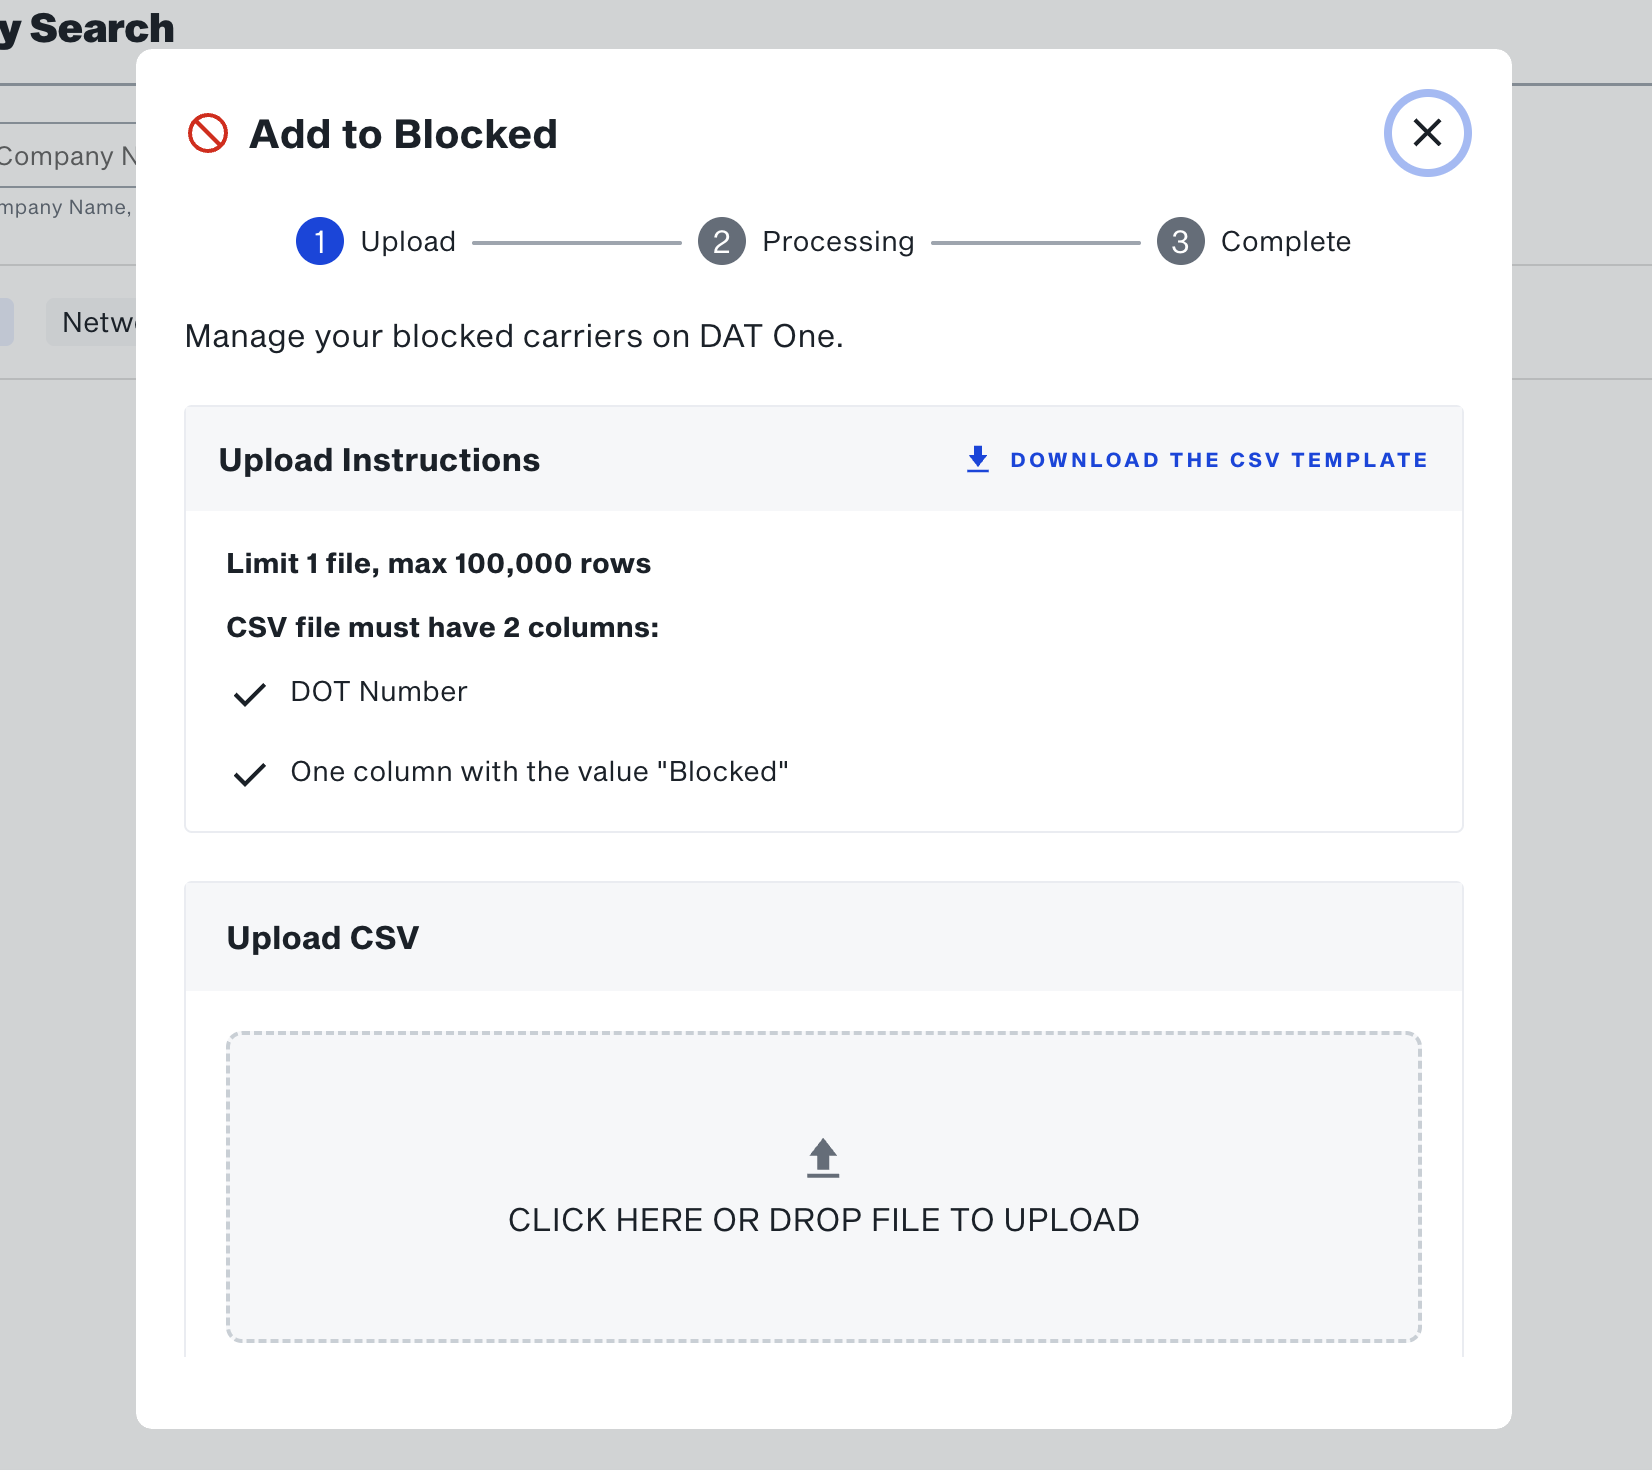
- The system automatically processes your file.
- You may close the upload window—the file will continue processing in the background.
- A progress spinner will display on the “Upload carrier list” area while the upload completes.
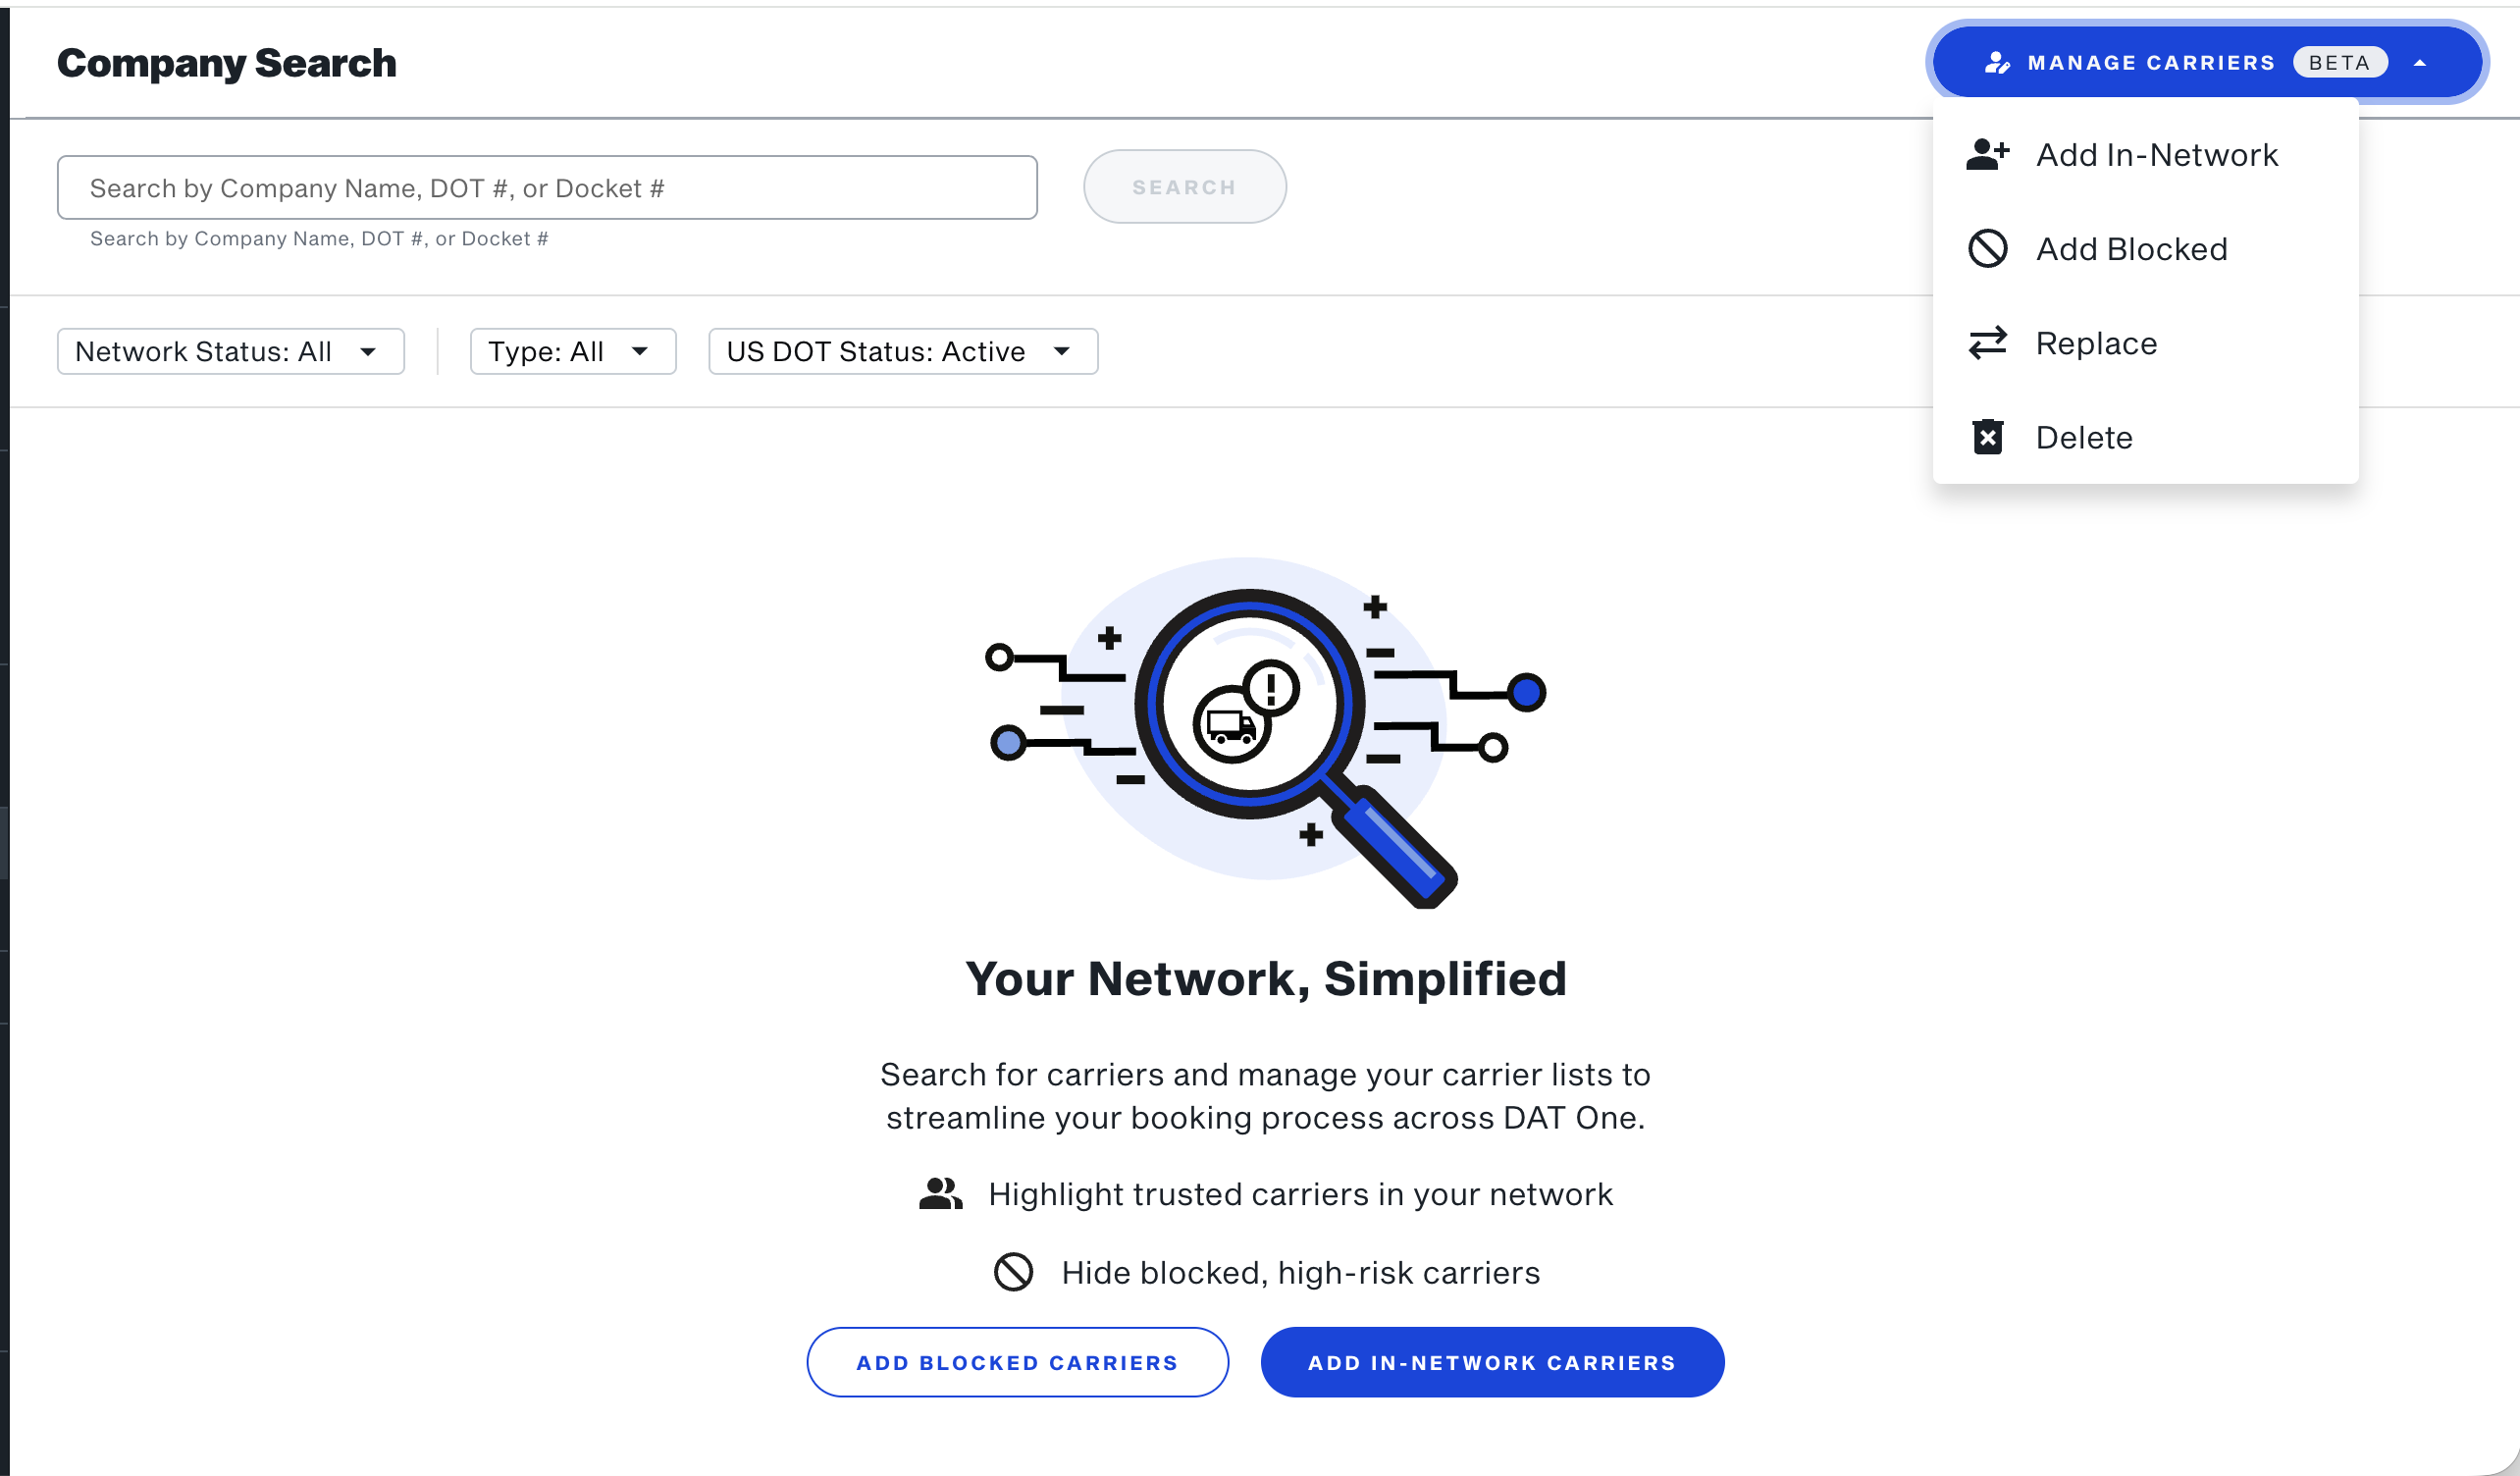
- Brokers can also add to, replace, or deletetheir uploaded carrier list from the Company Search screen.
Viewing Tagged Carriers
Once your upload is complete, the system will display indicators showing which carriers are part of your network. These tagged carriers are associated with your brokerage at the office or account level.
In Company Search
- Go to the Company Search page.
- Select All Carriers to view your entire list.
- Click the Network button to filter and show only carriers in
your network.
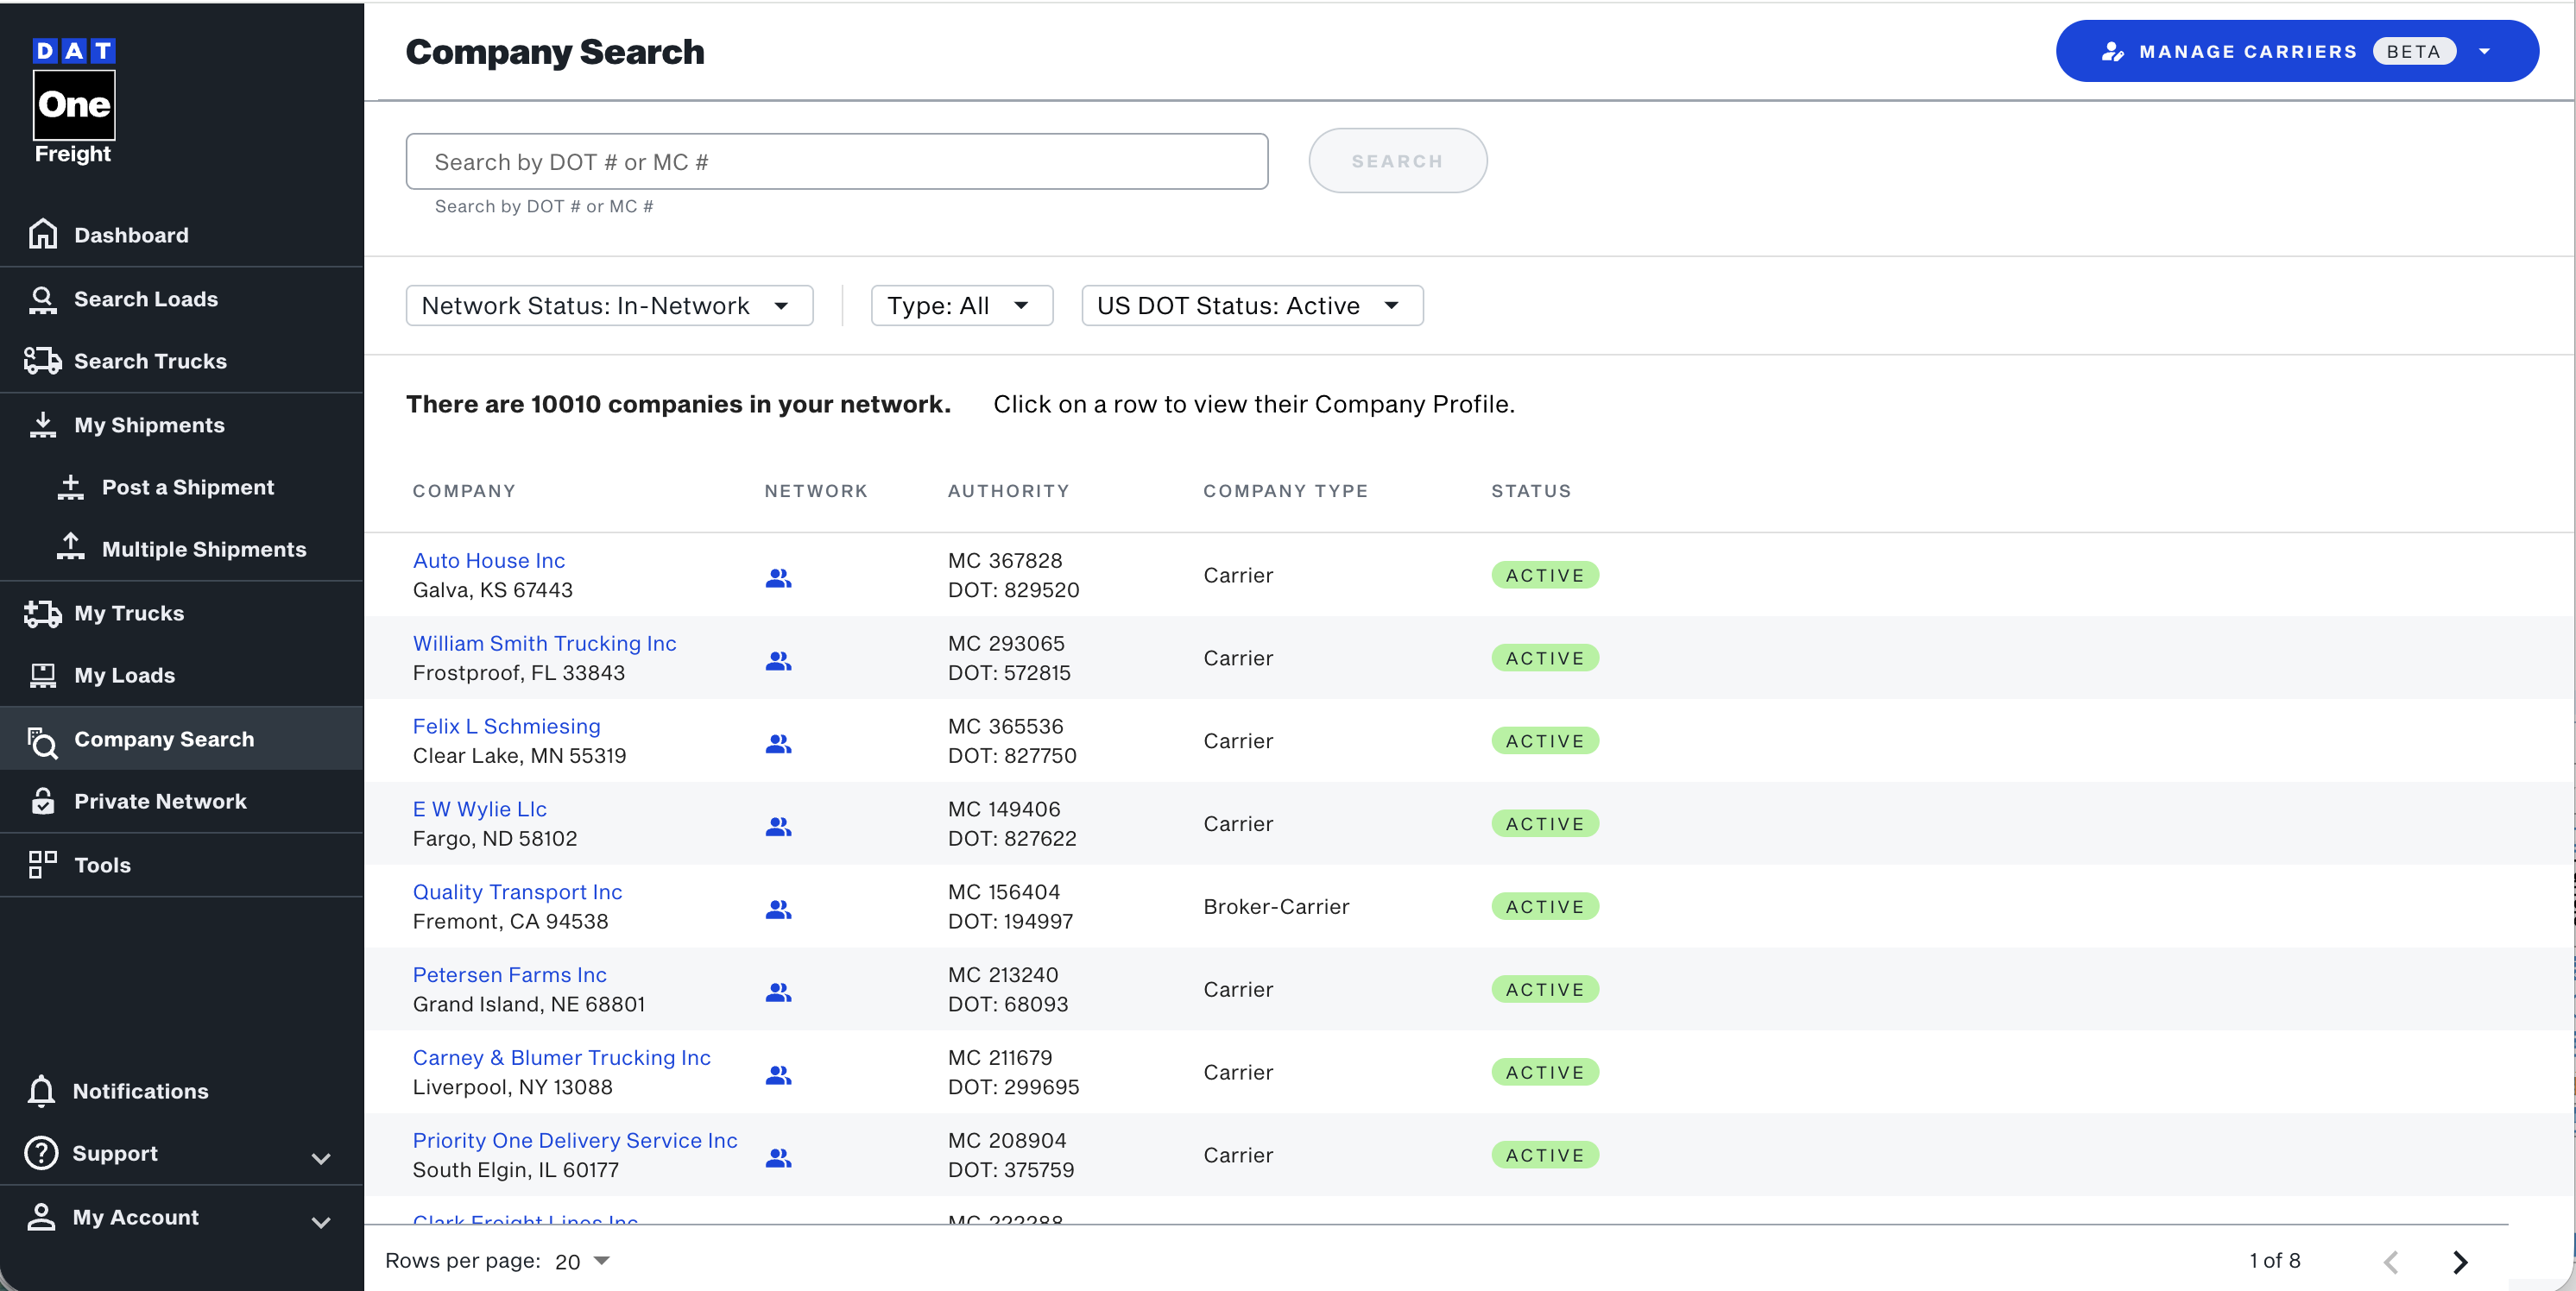
- When searching for a specific DOT, an “In Network” icon will appear next to carriers that belong to your network. Carriers marked as Blocked will display a Blocked icon.
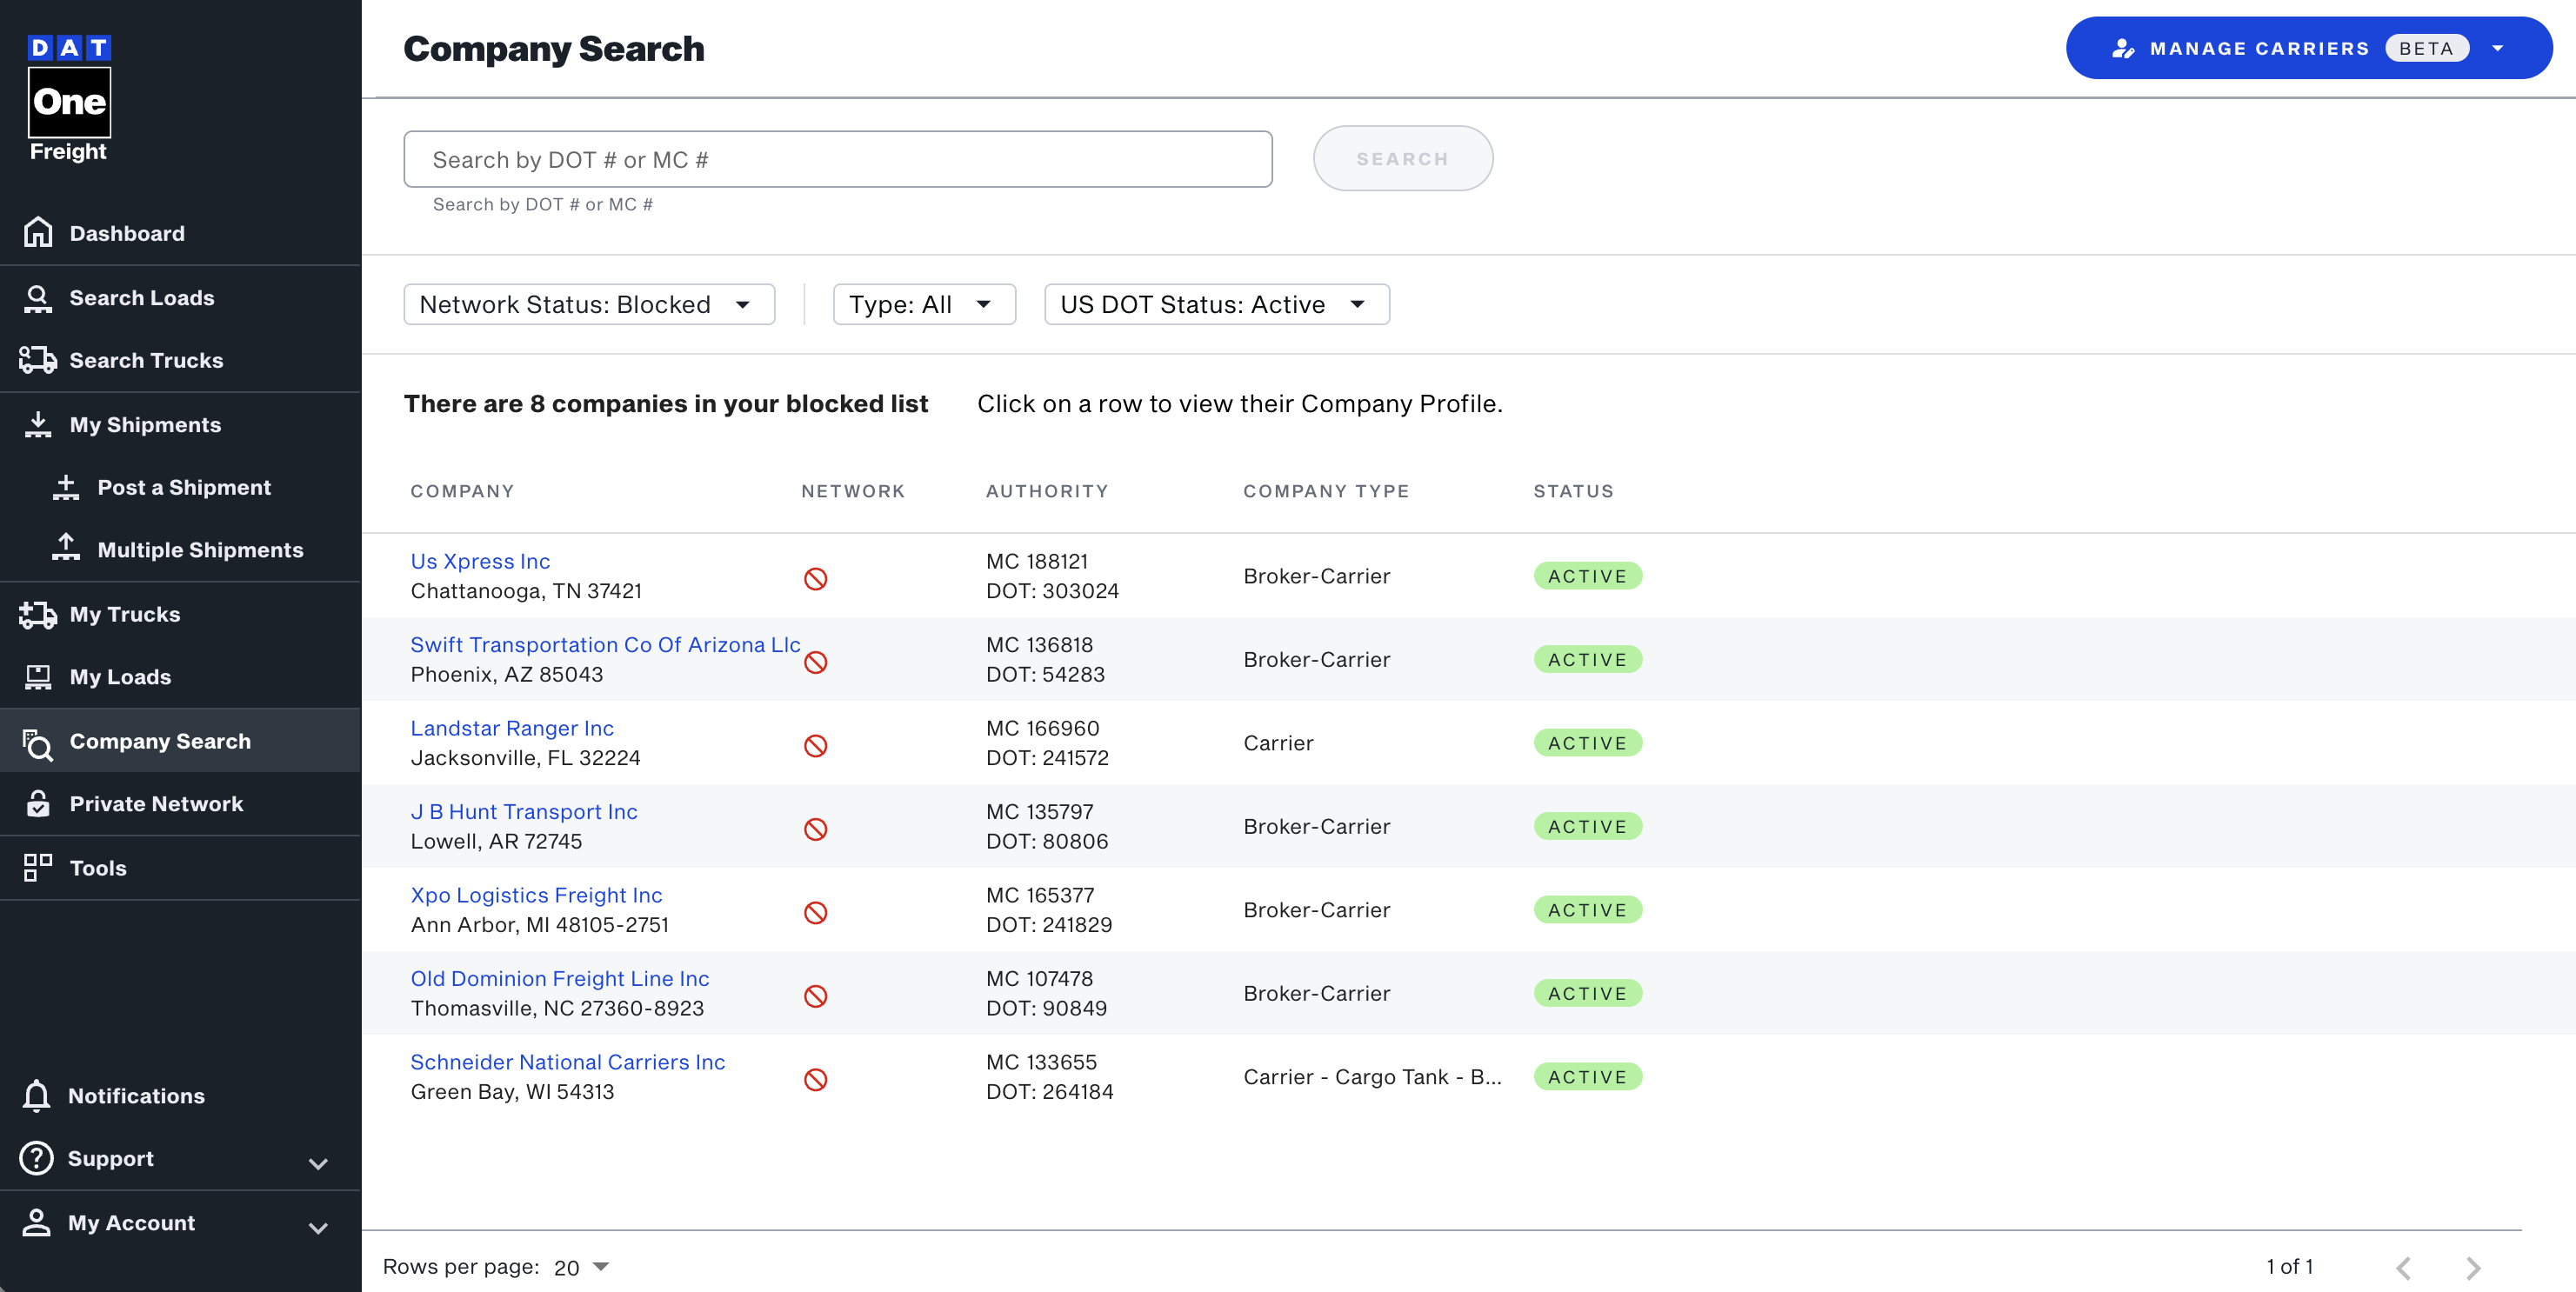
- In a carrier’s profile, the same “In Network” icon appears next to the company name. If the carrier is tagged as Blocked, a Blocked icon will appear instead.
In Truck Search
- When browsing truck search results, the “In Network” icon identifies which carriers posting trucks are part of your network. Carriers tagged as Blocked will display a Blocked icon.
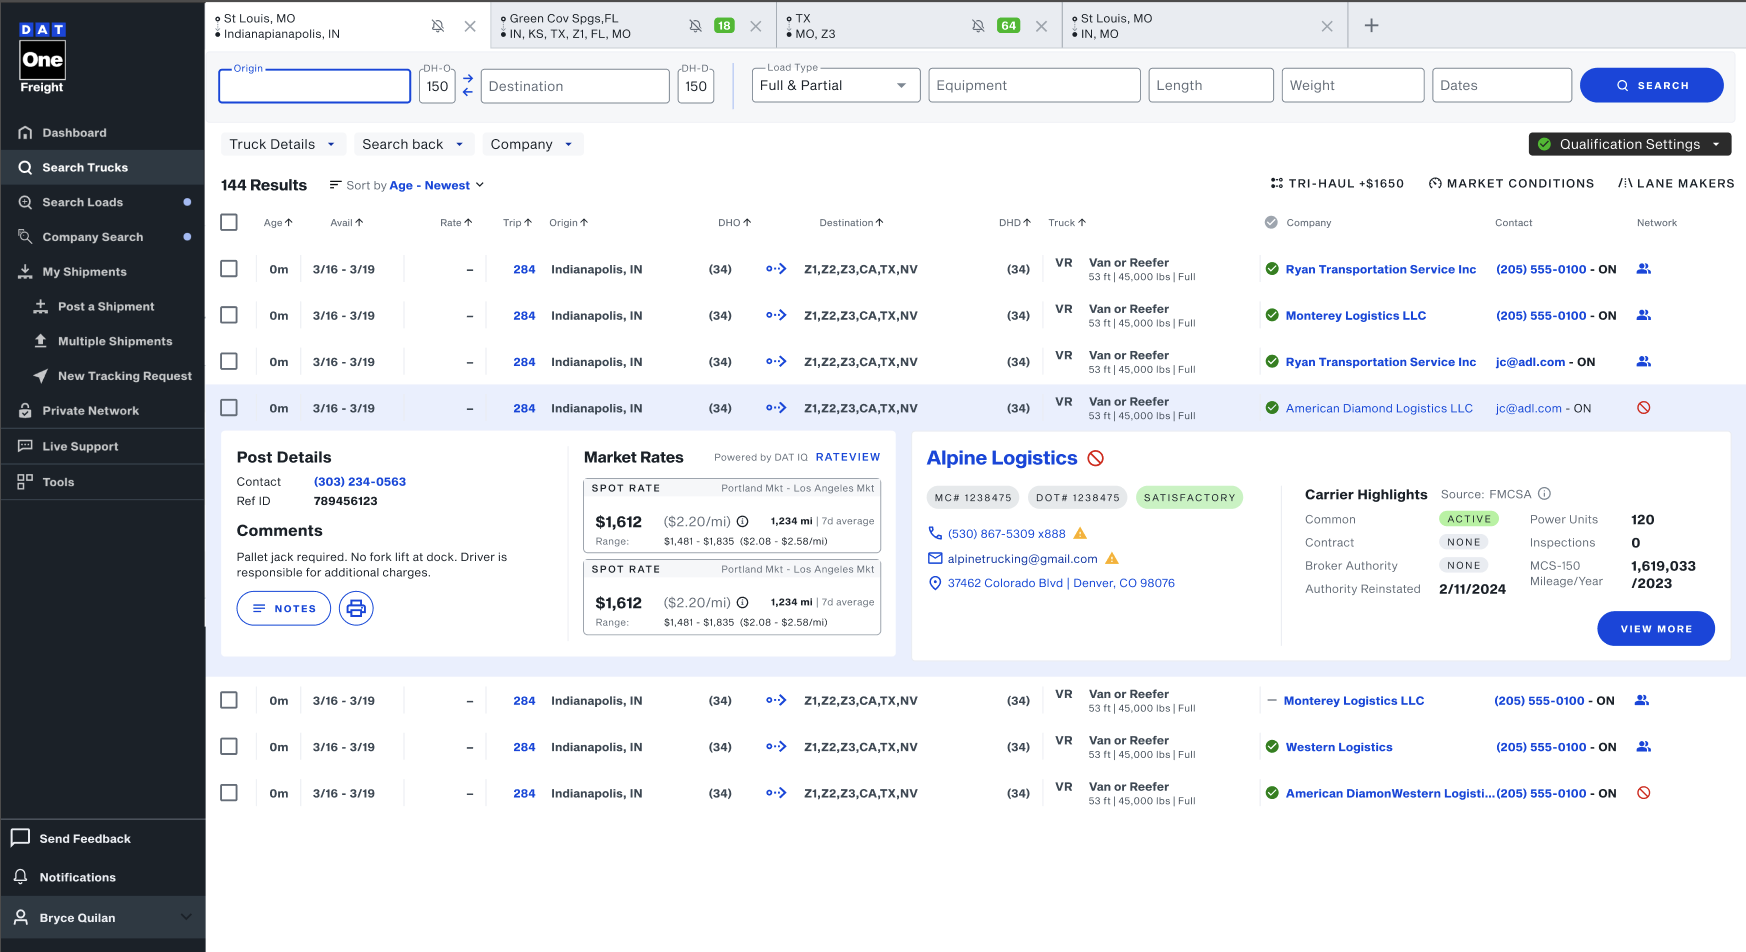
Note: Carrier tagging currently does not affect posting controls or search filters.